A few summers ago I bought two large windows. Why did I buy windows? I don't really know. I had a moment where I was feeling very shabby chic-y apparently. Actually, I think I had just gotten Pinterest and I was in that fever of seeing all these new projects with old windows for the first time.
Anyway, for several months the ones I bought just sat around doing nothing. Then I got an idea. What if instead of putting small pictures behind each pane (which is the most common thing people do with windows like this) I printed one large picture instead? I thought maybe it would look a little more modern that way. So I found two pictures from my trip to Paris that I thought would work and had them printed. I used Snapfish and got the pictures printed in the 20"x30" poster size for $18 each. That seems expensive now but at the time I thought it was reasonable. When I got them I taped them on the back of the frame.
I like the overall look. But the reason it took me so long to hang them is that there was no hanging hardware on the back.
It is just a simple wood frame window but for several reasons I was nervous. For one it is really old window so I wasn't sure how solid the wood was and so I hesitated to drill into it. And secondly these windows are pretty heavy like 15 pounds so knew I needed heavy duty hanging hardware. But you know what, you can't wait around forever so I just did it.
Here is what I did:
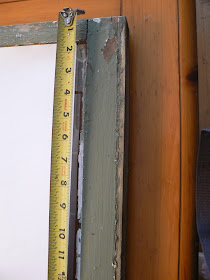
1) Measure and mark a spot 1/3 of the way down the frame. My frame was 30" tall so I marked a spot at 10" on either side.
2) Screw in hardware. I used these hooks from a hardware store. I screwed them in at an angle toward the center of the frame.
Like I said I was nervous to drill into the old wood but I found that using a screwdriver worked find. The wood was pretty soft (not falling apart soft, just not so hard that I needed a drill) and the screw went in easily.
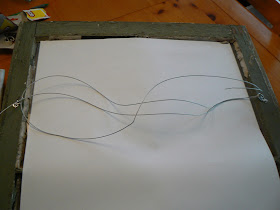
On each side I wrapped the end of the wire around all three strands.
After wrapping the end around several times I stuck the end through the last loop to make a sort of knot.
After trimming the ends, the back looked like this.
Admittedly, that looks a little wonky but here I demonstrate how it looks when pulled taut.
4) Put a screw in the wall and hang them up. The rest is pretty basic picture hanging. I measured and marked where I wanted them to hang and then got out my drill. I have plaster walls so I pre-drilled holes and then drilled my screw in.
They've been hanging up for several days now and no major catastrophes so I think they are good! If you are hanging a window in a hallway or somewhere where they might get knocked often I would consider using bracing brackets on the bottom corners. I'm not worried about these since they are in a corner but they can move pretty freely with the hanging wire so just keep that in mind.
Budget Breakdown:
Window - $5
Poster - $18
Hanging hardware - $5
= $28 each (not too bad for a 30"x25" piece of art!)
I love it when projects go this way, when I think they are going to be hard and then they turn out to be pretty simple. I'm glad I knocked this project off of my mental to-do list and I'm happy to say that I conquered a fear of hanging heavy objects, win-win! More pictures and info about the corner makeover here.
Are you into the old window look? Have you ever had to get creative when hanging stuff on the wall?


Thanks a ton!!! Googled "how to hang an old window" and your post came up, it told me exactly what I needed to know, because I had no idea where to start!!!!
ReplyDeleteYour welcome Billie! Glad I could help!
DeleteThank you! This is exactly what I needed to help me hang some windows in my home! :)
ReplyDelete